A Recipe to Celebrate #NationalPierogieDay!
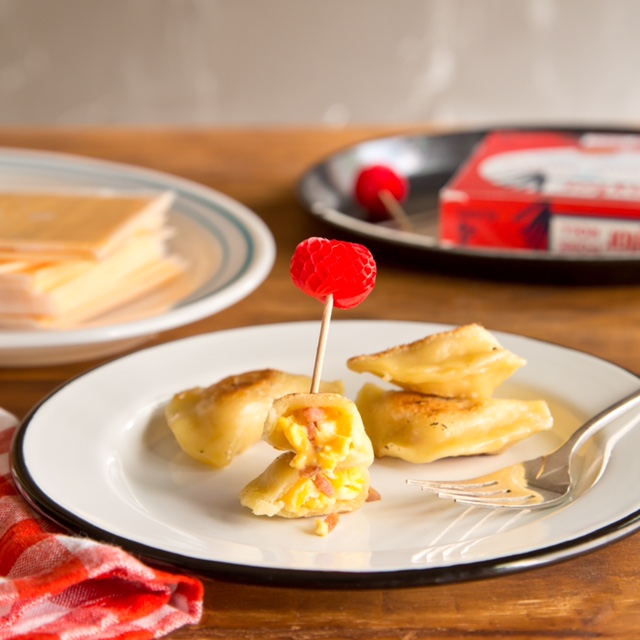
Jersey Breakfast Pierogies
by Casey Barber
(for more from Casey, check out episode 93 of Sharp & Hot, and find her at goodfoodstories.com)
Pierogi Love is dedicated to my beloved hometown of Pittsburgh, and in the book I talk a lot about my pride for western Pennsylvania and its culinary specialties. But that's not to say I can't throw a little love toward the food of my adopted home state of New Jersey, like the ubiquitous breakfast sandwich stacked with Taylor ham (if you're from North Jersey) or pork roll (if you're from South Jersey), egg, and cheese. No matter what you call it, you definitely don't need to be Jersey born and bred to appreciate it—and though every local deli and diner worth its salt serves this breakfast classic on a Kaiser roll, the holy trinity of ingredients tastes right at home inside a round of pierogi dough too.
Ingredients
BASIC SAVORY DOUGH
- 2 large eggs
- 1/2 cup (4 ounces, 113 grams) sour cream or plain Greek yogurt (full-fat, reduced-fat, or nonfat)
- 3 tablespoons (1 1/2 ounces, 43 grams) unsalted butter, melted and slightly cooled
- 1 teaspoon kosher salt
- 2 cups (8 1/2 ounces, 240 grams) unbleached all-purpose flour
- 1 tablespoon water
FILLING
- 2 American cheese slices
- 1 teaspoon unsalted butter
- 1 large egg
- 1 tablespoon milk
- 1 1/4-inch thick slice of Taylor ham/pork roll, finely diced
Directions
FOR DOUGH:
- Whisk 1 egg, sour cream or yogurt, butter, and salt in a bowl. Pour flour into a large bowl. Gently stir the wet ingredients into the flour. The dough will initially be very dry and shaggy, seeming as if it will never come together, but have no fear: Keep stirring, and it will pull itself into shape.
- Once the dough starts to come together, press and smash it against the sides of the bowl with your palms, picking up dough bits and essentially kneading it within the bowl until it forms a ball.
- Tip the dough and any remaining shaggy flakes out onto a clean work surface or Roul’Pat. Knead until smooth, about 1 minute. Cover the dough with the bowl and let rest 15 minutes.
- Whisk the remaining egg and water in a small bowl for egg wash.
FOR PIEROGI FILLING:
- Throw the wrapped American cheese slices in the freezer and let them hang out there while you make the rest of the filling.
- Melt the butter in a cast iron skillet or other heavy-bottomed pan over medium heat until the butter sizzles.
- Lightly whisk the egg and milk together, then pour into the pan. Let the eggs cook for a minute or two until they just begin to set, then gently stir with a spatula to bring the uncooked egg in contact with the bottom of the pan. Continue to cook and gently stir for a minute more, "chopping" the egg into small curds, until all the egg is just cooked through but still moist.
- Scrape the eggs into a bowl and return the pan to the stove, increasing the burner heat to medium-high.
- Add the ham to the pan and cook, stirring occasionally, until the pieces are caramelized, about 2-3 minutes.
- Scrape the ham into the bowl with the eggs and let cool to room temperature.
- Remove one slice of American cheese from the freezer, unwrap, and finely dice. Stir the cheese into the ham and egg, and repeat with the remaining slice.
ASSEMBLE:
- Line a rimmed baking sheet with waxed paper or parchment paper.
- Divide rested dough into 4 equal pieces with a bench scraper or knife. Set aside 3 dough pieces and cover with the mixing bowl. Roll remaining dough as thinly as possible into a rough 8- x 12-inch rectangle.
- Using a 3-inch round cookie cutter, cut out 6 rounds of dough. If the dough isn’t quartered evenly, you may get 5 rounds from one piece and 7 from another. Resist the temptation to re-roll dough scraps for additional rounds. It seems wasteful, but the dough won’t be as tender the second time around.
- Spoon 1 teaspoon filling into the center of dough rounds.
- Using your finger, swipe a very scant amount of egg wash—just a light touch—around the dough edge.
- Fold into a half-moon shape: Either fold the dough over the filling on the work surface—I call this “the blanket”—or gently cup the pierogi in your hand in a U shape—I call this “the taco.” Gently but firmly seal the pierogi by pinching and squeezing the edges together with your thumb and pointer finger. Start with one pinch at the top, then move to one “corner” of the pierogi and pinch along the edge back to the top. Repeat on the opposite side to finish sealing the pierogi.
- Transfer to the baking sheet and repeat with remaining dough rounds and filling. Freeze on the baking sheet, refrigerate up to 3 hours, or cook immediately.
COOKING AND STORING PIEROGIES
TO BOIL FRESH OR FROZEN PIEROGIES
Boil a pot of water over medium-high heat (fill approximately 1 quart water for every 6 pierogies). Add pierogies and cook until floating, 2 to 3 minutes for fresh and 4 to 5 minutes for frozen.
TO PAN-FRY FRESH OR BOILED PIEROGIES
Heat 1 tablespoon neutral oil (like canola or vegetable) or melt 1 tablespoon unsalted butter in a skillet over medium heat. Add as many pierogies as will fit in a single layer without crowding. Cook until pierogies are brown and crispy, about 2 minutes per side. Repeat with additional oil or butter and pierogies.
To cook large batches for parties, you can also pan-fry pierogies on an electric or two-burner stovetop griddle.
TO DEEP-FRY FRESH OR FROZEN PIEROGIES
Use an electric deep fryer or a large, high-sided pot filled with at least 2 inches of vegetable or canola oil (fill the pot no more than 1/3 full). Heat oil to 350 degrees. Add pierogies and cook until golden brown; frying time varies based on equipment, about 3 minutes for fresh and 5 minutes for frozen.
Line a baking sheet with paper towels. Transfer pierogies to the baking sheet and cool for 1 minute.
CASEY BARBER is a freelance food writer, photographer, and editor of the critically acclaimed website Good. Food. Stories. Her work has appeared in numerous national publications including Gourmet Live, ReadyMade, Today.com, The Kitchn, and DRAFT. Casey is also the author of Classic Snacks Made from Scratch: 70 Homemade Versions of Your Favorite Brand-Name Treats (Ulysses Press, 2013) and the co-writer of Inspired Bites: Unexpected Ideas for Entertaining from Pinch Food Design (Stewart, Tabori & Chang, 2014).


